
Santa Clarita Garage Door Maintenance Checklist: Springs, Rollers, Cables, Sensors & Opener
A homeowner checklist for springs, door balance, rollers, tracks, lift cables, photo-eye sensors, opener controls, lubrication, safety tests and early repair warning signs.
Found a frayed cable, broken spring, grinding roller or sensor problem? Stop operating the door if it is unstable or visibly damaged. Call (661) 449-2694 to ask Next Hour Garage Door Repair Santa Clarita about current service availability.
What should Santa Clarita homeowners include in garage door maintenance?
Inspect springs, rollers, tracks, cables, hinges and panels visually; keep photo-eye sensors clean; test opener safety functions according to the manufacturer; listen for new noise; and confirm the door stays level and smooth. Do not adjust torsion springs, cable drums or bottom brackets. A heavy, crooked, off-track or visibly damaged door needs repair rather than more DIY maintenance.
A Practical Garage Door Maintenance Checklist for Santa Clarita Homeowners
A residential garage door may be the largest moving system in a Santa Clarita home, and it combines several components that have to work together: springs counterbalance the door's weight, cables and drums help lift it evenly, rollers guide it through the tracks, hinges connect the sections, safety sensors help protect the closing path, and the opener moves a door that should already be mechanically balanced. Regular maintenance is therefore less about “tuning one part” and more about checking whether the whole system still moves smoothly, evenly and safely.
A good garage door maintenance checklist in Santa Clarita should help homeowners catch developing wear before it becomes a stuck door, a broken spring, an off-track roller, a frayed cable or an opener that begins straining. It should also make clear which tasks are safe to observe and which components should not be adjusted by a homeowner because of stored spring tension or door weight.
This guide is organized around the parts homeowners can see and the symptoms they can recognize. It covers springs, rollers, tracks, cables, drums, sensors, the opener, hinges, panels, weather seal, door balance, unusual noise and Santa Clarita operating conditions such as heat, dust and frequent daily garage use. The goal is prevention, safer operation and earlier diagnosis—not encouraging high-tension DIY repair.
What Should Be on a Santa Clarita Garage Door Maintenance Checklist?
A useful checklist should include visual inspection of springs, rollers, cables, tracks, hinges and panels; testing the opener's safety sensors and reversal according to manufacturer instructions; checking that the door moves level and smoothly; listening for new grinding, popping or scraping; and following the owner's manual for lubrication. Do not adjust torsion springs, cable drums, bottom brackets or other high-tension parts yourself.
Garage Door Maintenance at a Glance
| System | Safe homeowner check | Warning signs | Leave to a trained technician |
|---|---|---|---|
| Springs | Look for gaps, corrosion and obvious damage | Heavy door, loud bang, visible spring gap | Winding, unwinding, tension adjustment, spring replacement |
| Rollers | Watch for smooth rotation and stable travel | Grinding, wobble, cracked wheel, roller leaving track | Loaded roller removal where door stability/tension is involved |
| Tracks | Look for debris, visible bends and fresh scrape marks | Binding, crooked travel, loose bracket, recurring scrape | Track realignment on unstable or loaded doors |
| Cables | Look for fraying, corrosion, slack or cable off drum | Loose cable, crooked door, broken strands | Drum adjustment, cable replacement under tension |
| Sensors | Keep lenses clean and confirm indicators are normal | Door reverses, will not close, unstable sensor lights | Bypassing safety sensors |
| Opener | Listen for strain, review status lights, test controls | Grinding, humming, repeated stopping, inconsistent travel | Electrical repair beyond safe owner-level procedures |
| Hinges / panels | Look for cracks, movement and loose-looking hardware | Popping, torn attachment points, panel flex | Structural repair on loaded sections |
This table is intentionally conservative. A garage door can contain substantial stored energy, and parts that look simple may be connected to the counterbalance system.
Before You Start: Five Safety Rules for Any Garage Door Maintenance Check
- Keep the door path clear. Children, pets, tools, vehicles and storage items should be away from the moving door.
- Do not stand beneath an unstable or partly open door. If the door is crooked, off track or supported unevenly, stop the inspection and arrange repair.
- Do not touch high-tension hardware. Torsion springs, winding cones, cable drums, bottom brackets and lift cables can be dangerous to adjust.
- Use the owner's manuals. Door and opener manufacturers can specify model-specific lubrication, testing and maintenance steps.
- Stop if normal operation has changed. A new heavy feeling, grinding sound, cable slack or jerking movement is a repair symptom, not something to “work through.”
DASMA's current Automatic Garage Door Opener Safety & Maintenance Guide recommends making inspection and testing part of a regular routine and specifically warns that springs, cables, bottom brackets and related hardware can be under high tension.
1. Inspect the Garage Door Springs Without Adjusting Them
Springs are the heart of the counterbalance system. Their job is to offset much of the garage door's weight so the door can move in a controlled way. A torsion spring typically sits on a shaft above the door. Extension springs, when present, run along the horizontal tracks. Both types store mechanical energy.
A homeowner can perform a visual inspection from a safe distance. Look for a clear gap in a torsion spring, broken or separated coils, unusual corrosion, a spring that appears distorted, or hardware that looks displaced. Also pay attention to what the door is doing: if it becomes suddenly heavy, opens only a few inches or drops faster than normal, the spring system may need professional attention.
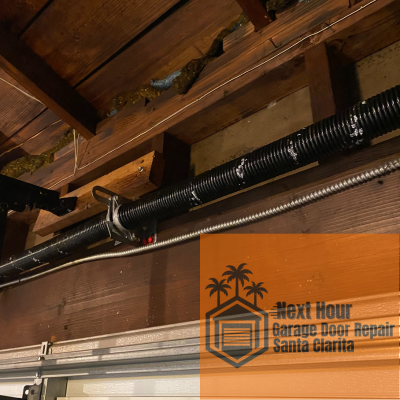
Do not wind, unwind, stretch or “tighten” a spring as routine maintenance. Do not loosen winding cones or spring brackets. If a spring needs tension correction or replacement, that belongs in trained service rather than a homeowner checklist.
2. Pay Attention to Door Balance and Weight
Door balance is one of the best indicators of overall counterbalance health. A properly balanced door should not rely on the opener to overcome excessive dead weight. If the door suddenly feels much heavier, accelerates downward, or becomes difficult to control, do not compensate by increasing opener force.
DASMA recommends following the owner's manual for manual-disconnect and balance testing. Because a broken spring, loose cable or unstable door can make manual movement unsafe, homeowners should not disconnect an opener from a door that is visibly damaged, crooked, off track or uncertain in balance.
If the door is mechanically stable and the manufacturer procedure calls for a balance test, follow that model-specific process. The purpose is to determine whether the spring system is supporting the door appropriately—not to adjust the spring yourself.
3. Watch the Rollers Through a Full Door Cycle
Rollers guide the door through the vertical, curved and horizontal tracks. During a maintenance check, watch the rollers rather than simply listening from across the garage. They should move through the tracks without severe wobble, grinding, hesitation or climbing the track edge.
Common warning signs include a cracked nylon wheel, a metal roller that rattles excessively, a bearing that grinds, a stem that appears bent, or one roller that becomes noisy at the same point every time. Pay special attention to the curved track, where the door sections change angle and worn rollers may become more noticeable.
A light maintenance-related sound can be different from a roller that is physically deteriorating. Lubrication may reduce friction at appropriate manufacturer-specified points, but it will not repair a cracked wheel or failed bearing. Next Hour's verified garage door roller replacement resource is useful when a roller is wobbling, grinding or no longer tracking smoothly.
4. Inspect the Tracks for Debris, Bends and Fresh Scrape Marks
Garage door tracks should provide a consistent path for the rollers. Homeowners can visually inspect accessible track areas for debris, obvious dents, loose-looking mounting points and fresh metal scrape marks. A track that appears bent or shifted can make a roller bind and may eventually contribute to an off-track condition.
Do not turn track adjustment into a routine DIY task. A small change in track geometry can affect how the door sections travel and how the rollers load the tracks. If the door is crooked or a roller has already left the track, do not loosen brackets or force the door through the damaged area.
Fresh scraping on one side is useful diagnostic information. Note where it happens in the door's travel and whether the door stays level. A repeatable scrape at the same height can help a technician isolate a roller, hinge or track problem.
5. Inspect Lift Cables for Fraying, Slack and Uneven Tension
Lift cables connect the lower part of the door to the drum-and-spring system on many residential doors. They help transfer the spring's counterbalance force so both sides of the door rise and lower together. Because cables operate under load, visual inspection is appropriate; adjustment is not.
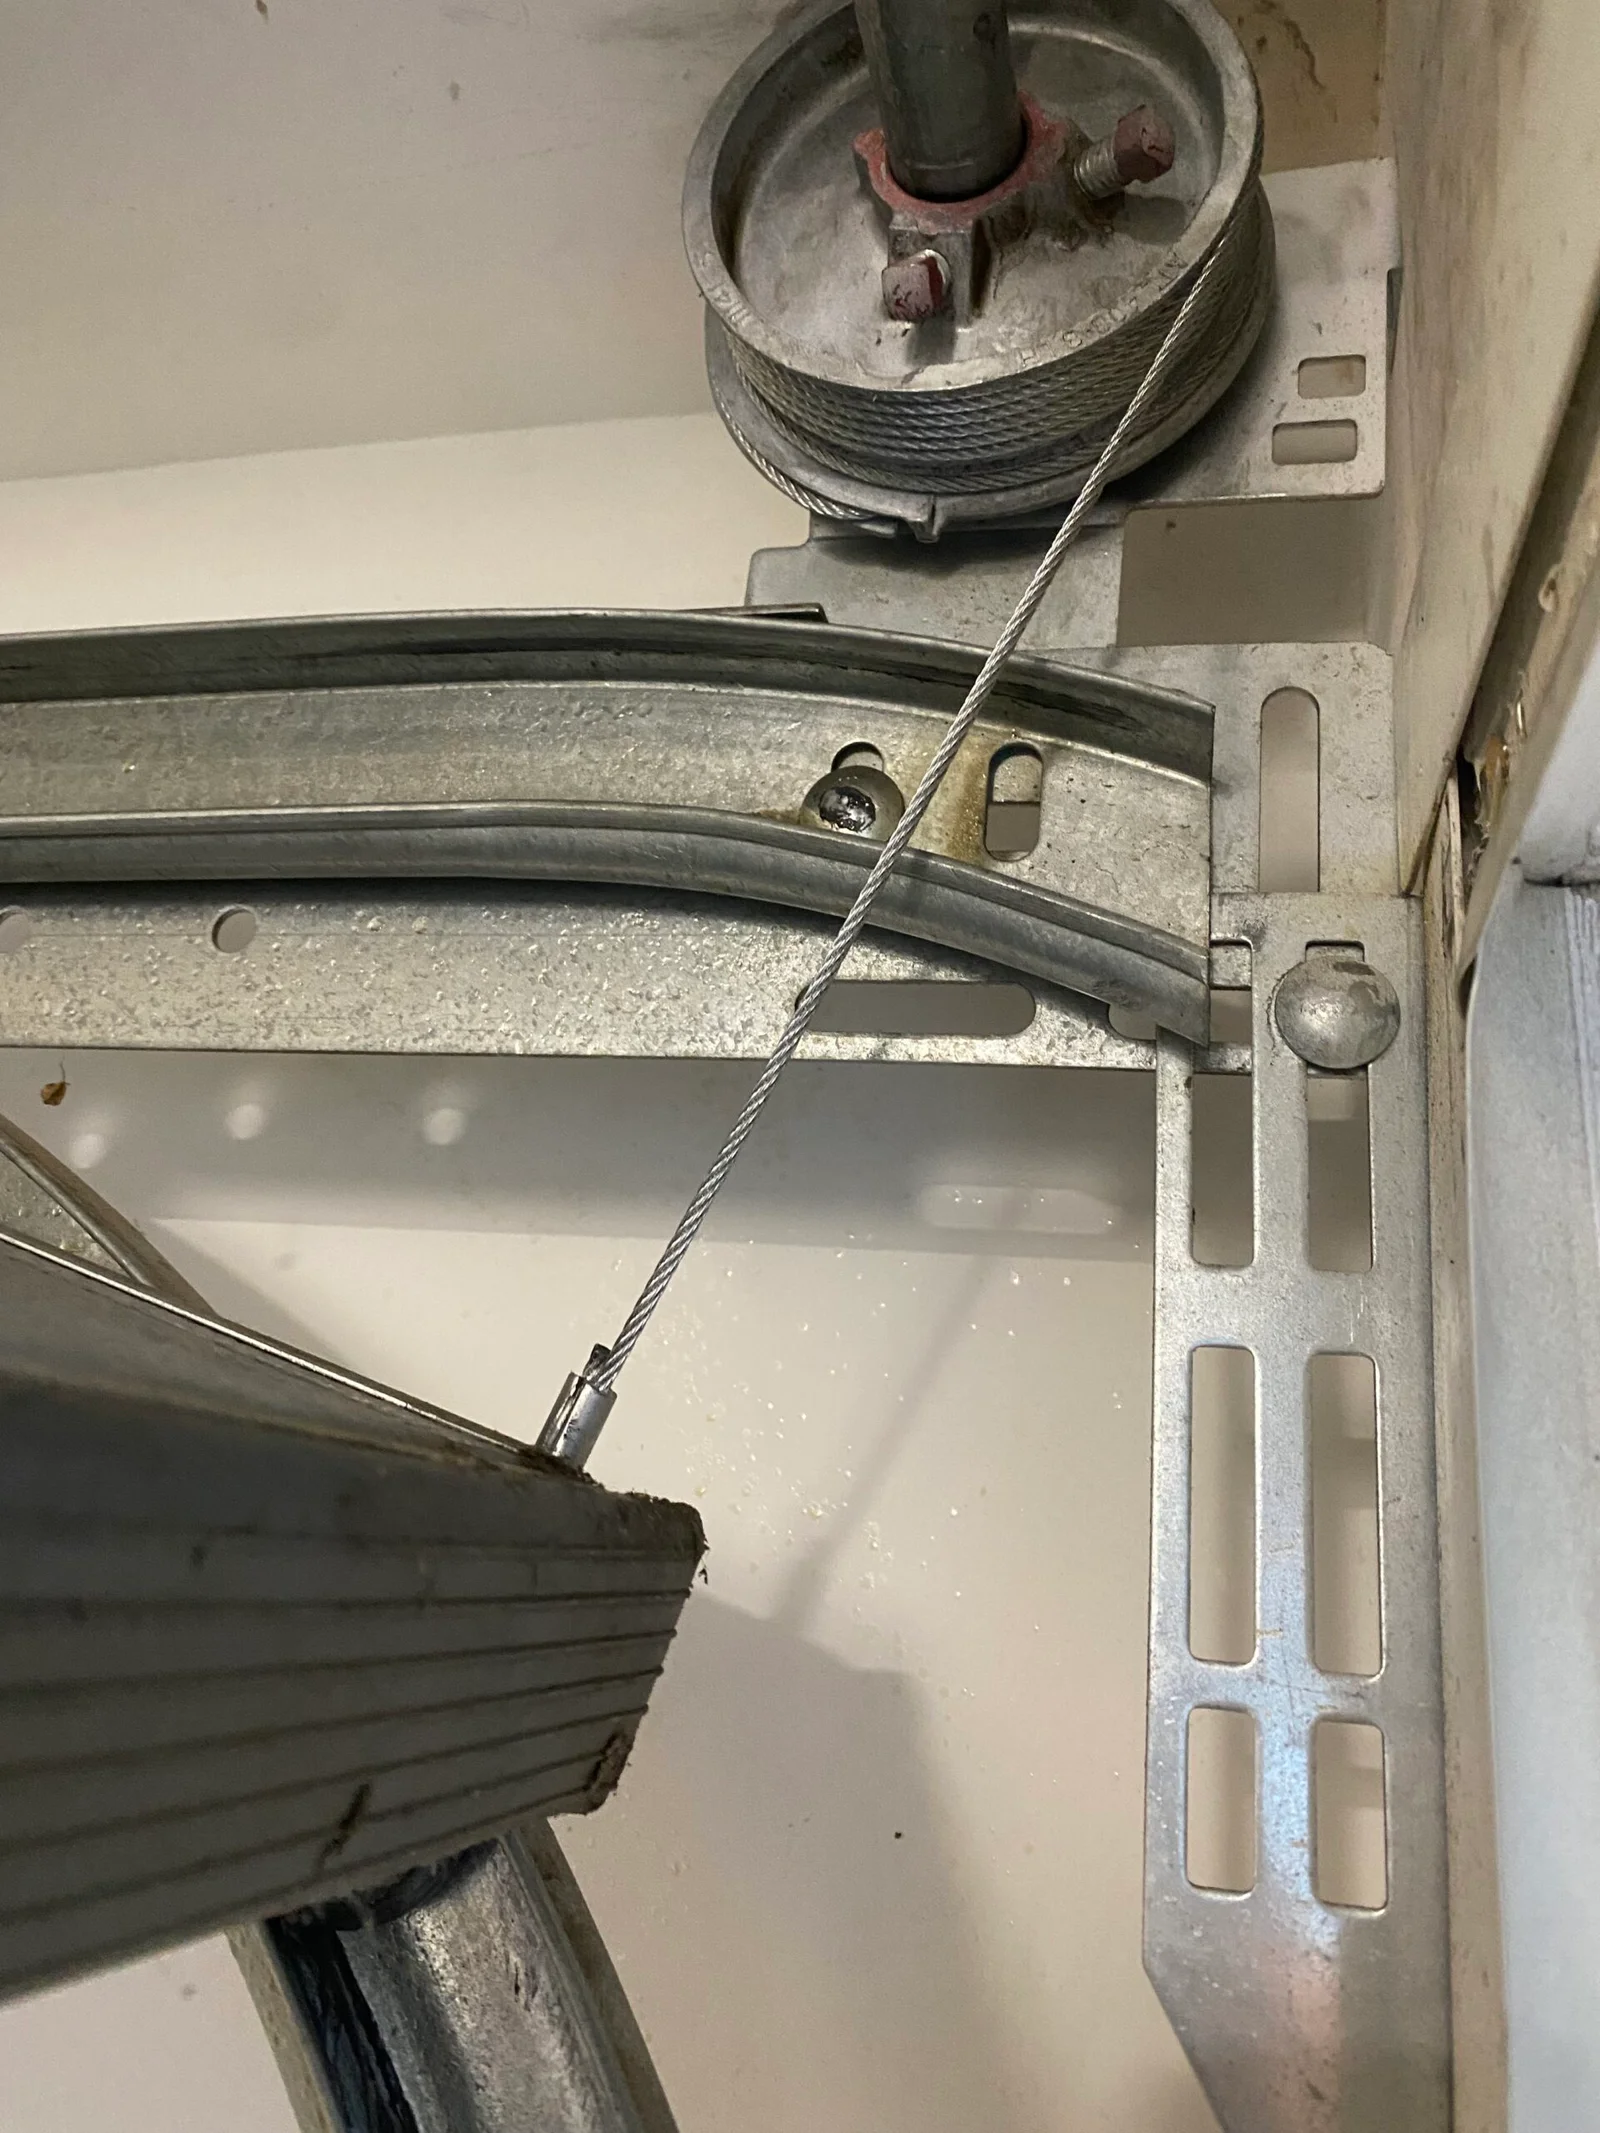
Look for broken strands, corrosion, flattening, kinks, a cable hanging loose, or a cable that appears to be winding incorrectly near the drum. If one side looks dramatically looser than the other, the problem may involve the cable, drum, spring system or door alignment.
A frayed cable is not something to “monitor until it breaks.” DASMA's maintenance guidance warns that worn or frayed cables can fail and should be handled by trained door-system technicians. Do not pull on the cable, reconnect it to a drum or loosen the bottom fixture where it attaches.
6. Look at the Cable Drums From a Safe Distance
Cable drums sit near the ends of many torsion shafts and guide the lift cables as the door moves. You do not need to touch them to identify obvious trouble. Look for a cable that has jumped a groove, overlapped itself, become tangled or come partly off the drum.
A cable-off-drum condition is often a symptom of another problem. A broken spring, uneven door position, roller binding, obstruction, damaged drum or previous adjustment issue can change cable tension. Rewinding the cable without finding the cause can allow the problem to return.
Drum set screws, shaft position and spring tension should not be adjusted as homeowner maintenance. If cable winding looks wrong, stop operating the door before a crooked travel pattern creates track or panel damage.
7. Check Hinges and Section Hardware for Movement or Damage
Hinges connect the door sections and allow them to pivot as the door transitions from vertical to horizontal. A hinge that becomes loose, bent or cracked can change roller alignment and create popping, rattling or uneven section movement.
During a visual check, look for cracks around hinge attachment points, screws or fasteners that appear to be backing out, bent hinge leaves or a section that flexes more than neighboring panels. A repeated pop at the same hinge deserves inspection before the attachment point tears farther.
Do not remove a hinge from a loaded or partially open door without understanding its relationship to roller position and section support. Maintenance is about identifying developing wear before it becomes structural damage.
8. Inspect Door Panels for Cracks, Bowing and Excessive Flex
Panels are more than cosmetic surfaces. They carry hinges, brackets and opener attachment hardware and must remain sufficiently rigid for the door to move squarely. A dent may be mostly cosmetic, but a crack around a hinge, severe bowing or a torn reinforcement point can affect operation.
Stand back and look across the door face when it is closed. Are the sections aligned? Is one panel visibly bowed? Does the top section flex dramatically when the opener starts? Are there cracks around hinges or opener reinforcement?
Structural panel movement can create popping, scraping and roller misalignment. If several sections are damaged, a technician may need to compare panel repair with broader replacement options. For routine maintenance, the key is catching structural change early.
9. Check the Bottom Seal and Perimeter Weather Seals
The bottom seal helps the door meet the floor and can reduce light, dust and air movement around the opening. Side and top seals can also deteriorate. Cracked, flattened, missing or hardened weather seal may allow more dust and hot air into the garage and can create slapping or squeaking at the end of travel.
Inspect the seal with the door closed. Look for large daylight gaps, torn rubber or a seal that has pulled out of its retainer. If the door must be forced hard against the floor to make the seal work, the issue may involve the seal, threshold or opener travel rather than a need for more closing force.
Weather-seal maintenance is a comfort and protection issue, but it can also help you notice whether the door is closing level across the floor.
10. Clean and Inspect the Photo-Eye Safety Sensors
Most modern automatic residential garage door openers use photo-eye sensors near the bottom of the tracks as part of the entrapment-protection system. The sensors should face each other, remain securely mounted and have clean lenses. A misaligned, dirty or obstructed sensor can cause a door to refuse to close or reverse unexpectedly.
Wipe the lenses gently with a clean, soft cloth and make sure storage items, leaves, boxes or other objects are not blocking the beam. Observe the sensor indicators according to the opener manual. Different manufacturers use different indicator-light patterns, so do not assume every blinking light means the same thing.
The U.S. Consumer Product Safety Commission states that automatic residential garage door operators are subject to the mandatory federal safety standard in 16 CFR Part 1211. See the CPSC's automatic residential garage door operator guidance. Do not bypass or permanently disable photo-eye sensors to make a door close.
11. Test Safety Reversal According to the Opener Manufacturer's Instructions
Safety reversal is an important part of opener maintenance. Because testing procedures and force/travel settings vary by opener model, homeowners should follow the manufacturer's manual rather than using an improvised test.
The test should confirm that the opener responds correctly to an obstruction and that the photo-eye system prevents unsafe closing. If the opener fails the manufacturer's safety test, stop normal use until the problem is corrected. Do not increase force to “push through” a failed test.
If the door itself is mechanically damaged, off track, unusually heavy or has a broken spring, correct that problem before relying on opener testing. An opener safety test assumes the door is mechanically serviceable.
12. Check Opener Power, Controls and Status Indicators
Garage door opener maintenance includes more than the motor. Check that the wall control responds normally, remotes function consistently, the opener's lighting behaves as expected and any diagnostic or status lights are understood using the model's manual. If the opener has battery backup, review the battery indicator and replacement guidance.
Listen for changes in sound. A new grind, hum, clicking pattern or vibration can point toward drive-system wear, motor load, mounting movement or a mechanical door that is harder to move than before.
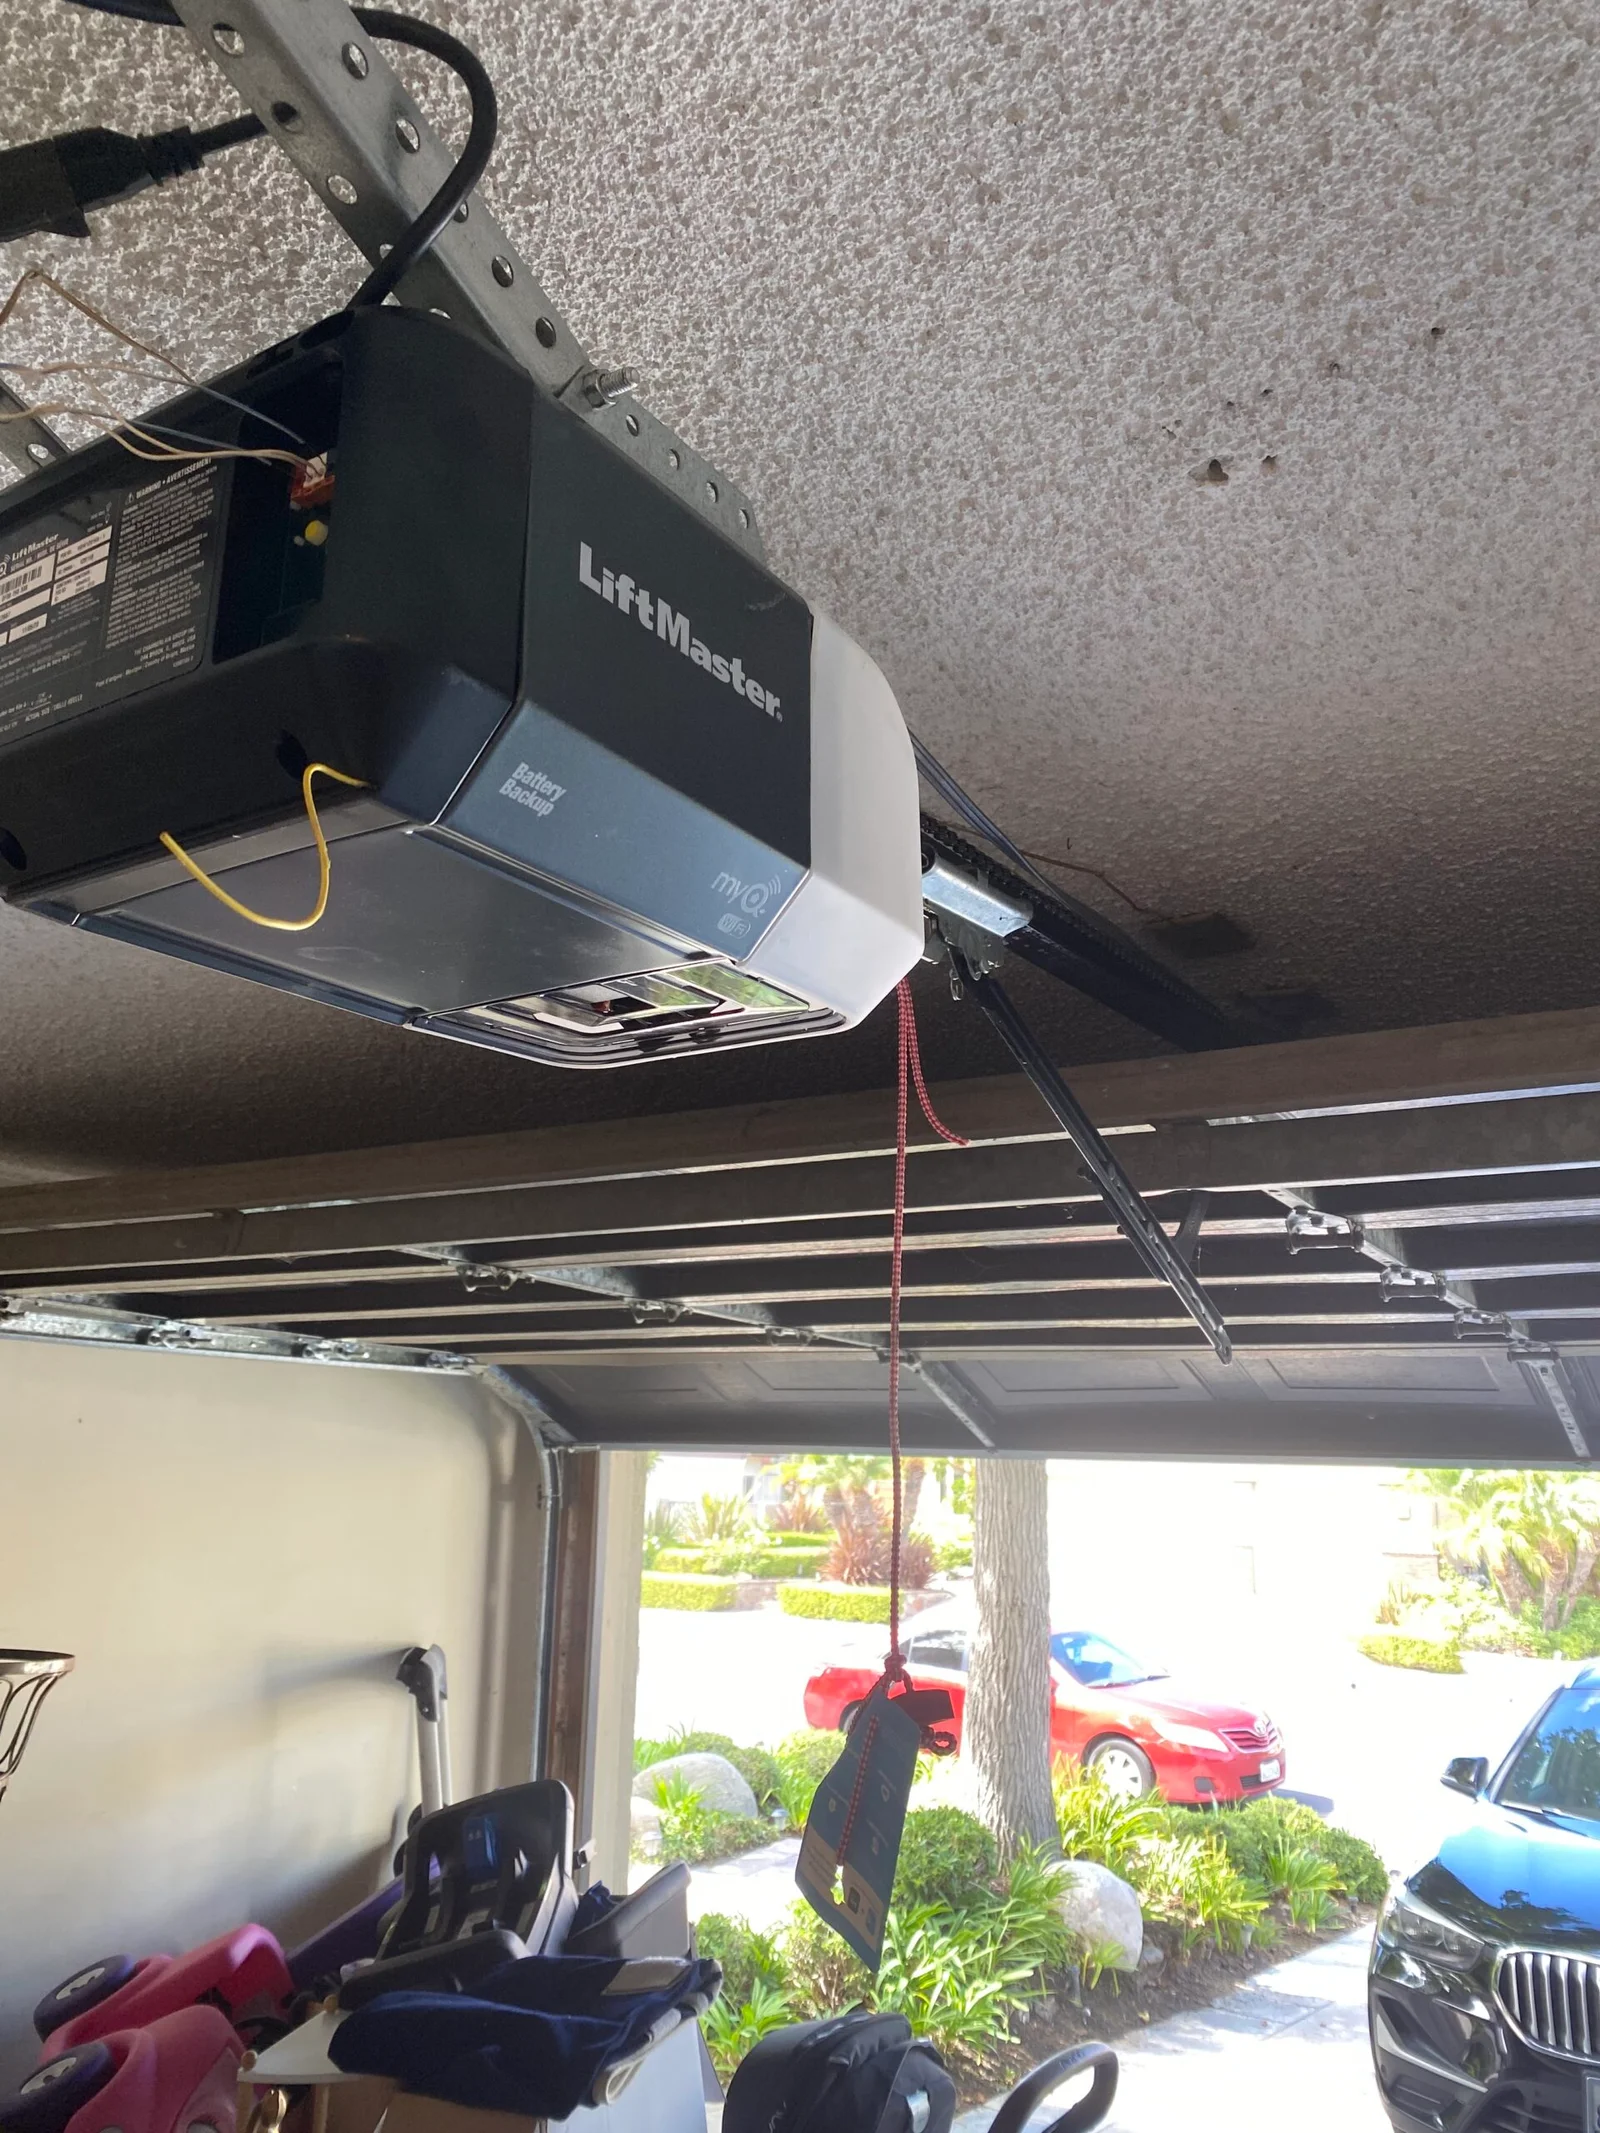
If the opener suddenly stops responding, confirm electrical power before assuming the motor failed. But if it hums while the door barely moves, the door's springs, balance, rollers and tracks should be inspected before a stronger opener is considered.
13. Inspect the Opener Rail, Chain or Belt Without Over-Adjusting
Conventional ceiling-mounted openers use a rail and trolley moved by a chain, belt, screw or other drive system. Wall-mount openers use a different configuration at the torsion shaft. In either case, mounting points should remain secure and the drive should operate without excessive slack, banging or vibration.
Do not automatically tighten a chain because it looks loose. Many opener manufacturers specify an amount of chain or belt sag and have model-specific adjustment procedures. Over-tightening can place unnecessary load on bearings, sprockets or the rail.
The most useful homeowner maintenance step is observation: note new vibration, a rail that flexes abnormally, a trolley that jerks or a drive that sounds very different from normal. Then consult the manual or arrange diagnosis.
14. Know Where the Emergency Release Is—but Use It Only When the Door Is Stable
The emergency release disconnects many ceiling-mounted openers from the garage door so the door can be moved manually. Homeowners should know where it is and understand the manufacturer's instructions, especially for a power interruption.
But the release is not a universal troubleshooting tool. Do not pull it when the door is open, crooked, off track, supported unevenly or suspected of having a broken spring. Disconnecting the opener can change how an unstable door is supported.
Maintenance includes understanding the control without using it in unsafe conditions. If the door is mechanically sound and the manual calls for a disconnect/balance check, follow the model-specific procedure.
Maintenance Found a Real Problem?
A cracked roller, frayed cable, broken spring, failed safety test or crooked door has moved beyond routine maintenance. Diagnose the actual component before continuing to operate the system.
15. Lubricate Only the Parts the Door or Opener Manufacturer Specifies
Lubrication can reduce friction and noise at appropriate moving points, but “spray everything” is not a maintenance plan. Depending on the system, manufacturer guidance may call for lubrication of hinges, certain roller bearings, springs or other moving points. Some sealed bearings may not require the same treatment as open bearings.
Avoid filling the inside of the tracks with heavy grease. Tracks guide rollers; grease can collect dust and does not repair a bent track or worn bearing. Avoid spraying electronics, photo-eye lenses, brake surfaces or components the manufacturer does not identify as lubrication points.
DASMA's maintenance guide recommends consulting the owner's manual and notes that hinges, rollers, springs and panels should be inspected for wear or damage, with periodic lubrication where appropriate. Use that principle rather than a one-size-fits-all product recommendation.
16. Listen for New Squeaking, Grinding, Popping, Rattling or Scraping
Sound is one of the easiest maintenance clues to track over time. A light squeak may indicate a lubrication or hinge issue. Grinding can suggest a worn roller, track contact or opener drive problem. Popping can come from hinge movement, panel flex, spring-related motion or a roller binding through the curved track. Scraping can signal alignment trouble.
The timing and location of the sound are often more useful than the volume. Note whether it occurs during opening, closing, at one track height, near the spring, inside the opener motor unit or when the bottom seal reaches the floor.
If the sound is new and paired with crooked travel, a loose cable, visible spring damage or jerking, stop operating the door. The previous article on early garage door repair warning signs explains how noise, slow movement, balance changes and visible wear can indicate that maintenance has crossed into repair territory.
A 10-Minute Garage Door Maintenance Walkthrough
A simple walkthrough can make maintenance easier because it follows the order the door actually operates. Start with the door closed and the garage clear. Stand back and inspect the panels, hinges, bottom seal, springs and visible cables. Look for anything that appears broken, displaced or dramatically different from the previous check.
Next, if the door is mechanically stable, operate one full opening cycle while listening and watching. Do not stand under the door. Watch the bottom edge to confirm the door remains level. Follow the rollers with your eyes as they move through the vertical and curved tracks. Listen for one roller that clicks or grinds at the same point. Watch the opener rail for unusual flex or vibration.
During closing, observe the safety sensors and track path. If the door reverses unexpectedly, stop and identify whether the cause is an obstruction, photo-eye issue or mechanical resistance. Do not keep cycling the door to see if the problem disappears.
Finish by checking the opener's status indicators and any battery-backup warning. Write down anything that changed. A short note such as “right roller grinds at halfway point” or “sensor light flickers in afternoon sun” is much more useful than a general description that the garage door seems old.
17. Watch Whether the Door Stays Level and Centered
A healthy sectional garage door should move through the opening without developing a strong tilt to one side. Small visual differences in trim are not the same as a door that clearly lifts unevenly. Crooked movement can point toward a cable problem, drum issue, spring imbalance, track problem or structural distortion.
Watch the bottom edge during opening and closing. Does one side rise first? Does the door scrape one track? Does the gap to the tracks appear much tighter on one side?
If the door becomes crooked, stop repeated operation. Continuing to cycle an uneven door can push rollers out of the track and create panel or cable damage.
18. Treat Any Off-Track Roller as a Repair Issue, Not Routine Maintenance
A roller outside the track is no longer a routine maintenance finding. It means the door has derailed from the system intended to guide its weight. The root cause can involve a worn roller, bent track, loose cable, spring imbalance, hinge damage, vehicle impact or another alignment problem.
Do not push a roller back into the track while the door is loaded or while cable and spring conditions are uncertain. Stop operating the opener and arrange inspection before normal use resumes.
19. Adjust Your Maintenance Awareness for Santa Clarita Heat and Dust
Santa Clarita's warm, dry conditions can make maintenance issues easier to notice. Garage heat can affect lubricant behavior and opener operating temperature. Dust can collect around tracks, rollers, hinges and older lubricant. Direct afternoon sun can also complicate some photo-eye sensor installations.
These local conditions are useful context, but they should not be used to blame every failure on heat. A broken spring is still a spring failure. A grinding roller still needs roller and track inspection. A sensor problem should be tested as a sensor, wiring or alignment issue rather than being dismissed as “just the weather.”
During hotter periods, pay closer attention to new noise, opener strain, battery-backup warnings and whether the same problem appears only after the garage has been warm for several hours.
20. Attached Garages Deserve Extra Attention to Noise and Vibration
In an attached garage, opener and door vibration can transfer through shared walls and ceilings. A new rattle that would be easy to ignore in a detached garage may be very noticeable in a room above the garage. This makes sound a useful maintenance clue.
Do not assume the opener is always the source. Rollers, hinges, tracks, panels and poor balance can all transmit vibration. A quieter belt-drive or wall-mount opener may reduce drive noise, but it cannot make a damaged roller or misaligned track mechanically healthy.
If household members notice a change in garage noise from inside the home, identify whether the change is tied to opening, closing, one side of the door or the opener motor.
Maintenance vs. Repair: Know When the Checklist Has Found a Real Failure
Maintenance focuses on observation, cleaning, manufacturer-appropriate lubrication and safety testing. Repair begins when a component is damaged, worn beyond serviceable condition or no longer operating correctly. The difference matters because homeowners should not keep applying maintenance steps to a failed component.
A dry hinge can be maintenance. A cracked hinge or torn attachment point is repair. A roller that needs approved lubrication can be maintenance. A roller with a cracked wheel or failed bearing is repair. A sensor lens with dust can be maintenance. A sensor with damaged wiring or failed electronics is repair. A spring that has broken is never a lubrication problem.
The same distinction applies to the opener. A remote with a weak battery can be owner-level maintenance. An opener that grinds because a gear has failed requires diagnosis and repair. A door that is difficult to lift because of spring failure should not be “fixed” by increasing opener force.
The purpose of a checklist is therefore not to keep the homeowner doing more tasks. It is to identify the point where safe observation has provided enough evidence that professional repair makes sense.
How Often Should You Check a Garage Door?
Follow the maintenance and testing schedule in the owner's manuals for the specific door and opener. DASMA's current safety and maintenance guide recommends making inspection and testing part of a regular routine and specifically references monthly inspection and testing of the door and opener system.
A practical homeowner approach is to combine the manufacturer's schedule with immediate attention to changes. Do not wait for the next calendar check if the door suddenly becomes heavy, crooked, noisy, slow or inconsistent. New symptoms take priority over the routine schedule.
High-use garages may reveal wear sooner simply because the door accumulates more cycles. A household that uses the garage as the primary vehicle entrance may therefore benefit from being more observant than a garage opened only occasionally.
Seasonal Santa Clarita Maintenance Checklist
Springs: visually check for gaps, corrosion or obvious damage; never adjust tension yourself.
Rollers: watch for smooth travel, stable wheels and no repeated grinding.
Tracks: keep accessible areas free of debris and note bends, scrape marks or loose-looking hardware.
Cables: check for fraying, corrosion, slack or abnormal drum winding.
Hinges: look for cracks, movement and torn attachment points.
Panels: look for bowing, cracks and excessive flex around hardware.
Weather seals: inspect for tears, flattening and large daylight gaps.
Photo eyes: clean lenses, clear the beam path and verify indicators according to the manual.
Opener: listen for new noise, review diagnostic lights and confirm controls work normally.
Safety reversal: test according to manufacturer instructions.
Door movement: watch for level, smooth travel without jerking or scraping.
Heat / dust: note temperature-related patterns and keep accessible moving areas reasonably clean.
Maintenance Red Flags: Stop Using the Door and Call for Repair
- A visible gap in a torsion spring.
- A loud bang followed by a heavy door.
- A frayed, loose or broken lift cable.
- A roller outside the track.
- A door that hangs crooked or moves unevenly.
- Grinding or scraping paired with jerking.
- A door that drops or accelerates unexpectedly.
- An opener that hums while the door barely moves.
- A photo-eye or reversal system that does not pass the manufacturer's safety test.
- Cracked panels or torn hinge attachment points affecting operation.
These conditions are beyond ordinary maintenance. The goal is to stop a developing problem before continued operation causes additional damage or creates a safety hazard.
Maintenance for Rental Properties and HOA Homes in Santa Clarita
Landlords, property managers and HOA homeowners benefit from documenting garage door condition because multiple people may use the same system. A tenant may notice new noise before the property owner sees the door. A property manager may need a simple checklist that records whether sensors, cables, springs, rollers and opener controls appear normal.
For rental properties, maintenance communication should emphasize that occupants should not attempt spring, cable or track repairs themselves. The property owner or manager should receive reports of new grinding, a door that will not close, a cable hanging loose, a heavy door or a failed safety test promptly.
HOA rules may affect exterior door appearance or replacement choices, but routine mechanical maintenance remains focused on the door system itself. If a repair progresses into complete door replacement or structural modification, homeowners can then review any association or permit requirements relevant to that scope.
What a Professional Garage Door Tune-Up Can Add Beyond a Homeowner Checklist
A homeowner checklist is primarily visual and behavioral: look, listen and recognize changes. A professional tune-up can go further by evaluating door balance, spring condition, cable and drum condition, roller wear, track alignment, hinge movement, opener load, travel and safety functions.
The technician can also determine whether a noisy or slow door needs lubrication, adjustment or component replacement. That distinction matters. Replacing a worn roller is different from lubricating a serviceable one. Correcting cable tension is different from cleaning a track. Repair should match the actual condition.
Next Hour's garage door tune-up and inspection page is a natural next step when the door is still operating but homeowners want a more complete mechanical review.
Questions to Ask Before Hiring a Garage Door Company for Maintenance or Repair
- Which component is actually causing the symptom?
- Is the issue maintenance-related or does a part need replacement?
- Is the door properly balanced by the spring system?
- Are both lift cables in serviceable condition?
- Are any rollers or tracks damaged?
- Were photo-eye sensors and reversal functions tested after work?
- Will the opener be tested only after the mechanical door is operating correctly?
- What parts and labor are included in the quote?
- Will additional work require approval before it is performed?
- What owner maintenance does the manufacturer recommend after repair?
California homeowners who want to verify contractor information can use the official California Contractors State License Board Check a License tool. This article does not claim a specific Next Hour license number or classification.
Why Consider Next Hour Garage Door Repair Santa Clarita for Maintenance and Repair?
Next Hour Garage Door Repair Santa Clarita | Garage Spring & Opener Repair is a local garage door repair option for Santa Clarita homeowners who need help with springs, rollers, cables, sensors, opener problems, door balance and related residential garage door maintenance concerns.
A useful maintenance visit should begin with diagnosis rather than a one-size-fits-all parts list. If a roller is worn, the recommendation should address the roller. If the spring system is failing, the repair should focus on counterbalance. If the opener is working but the door is binding, the mechanical door should be corrected before the opener is blamed.
For current service availability, call (661) 449-2694, visit Next Hour Garage Door Repair Santa Clarita, or view Next Hour Garage Door Repair Santa Clarita on Google Maps.
Santa Clarita Valley Maintenance Context
The primary geographic focus for this checklist is Santa Clarita, California, including the 91387 local context and the broader Santa Clarita Valley. Supporting service-area communities may include Valencia, Canyon Country, Saugus, Newhall, Stevenson Ranch, Castaic and Hasley Canyon when current service coverage applies.
These communities are service-area references, not claims that Next Hour Garage Door Repair maintains separate public offices in each location. The maintenance principles are the same throughout the Santa Clarita Valley: inspect the system as a whole, act on new warning signs and leave high-tension repairs to trained technicians.
Frequently Asked Questions About Garage Door Maintenance in Santa Clarita
What should I check during garage door maintenance in Santa Clarita?
Check the springs visually, watch rollers and tracks during travel, inspect cables for fraying, clean the photo-eye sensors, test safety reversal according to the opener manual, listen for new noise, and confirm the door moves level and smoothly. Do not adjust springs, cable drums or bottom brackets yourself.
How often should I inspect my garage door?
Follow the schedule in the owner's manuals for the door and opener. DASMA's safety and maintenance guidance recommends making inspection and testing part of a regular routine and references monthly inspection and testing of the garage door and opener system.
Can I lubricate my garage door myself?
Yes, but only at the points and with the product types recommended by the door or opener manufacturer. Do not fill tracks with heavy grease or use lubrication as a substitute for repairing a worn roller, broken spring or bent track.
How do I know if my garage door spring needs repair?
Warning signs include a visible gap in a torsion spring, a loud bang, a suddenly heavy door, an opener that lifts only a few inches or cables that lose normal tension. Do not adjust spring tension yourself.
What should I look for on garage door cables?
Look for frayed strands, corrosion, kinks, unusual slack, a cable hanging loose or abnormal winding on the drum. Do not pull, reconnect or rewind a lift cable under tension.
How do I maintain garage door safety sensors?
Keep the photo-eye lenses clean, keep the beam path clear, confirm the indicator lights behave according to the opener manual and test the system according to manufacturer instructions. Never bypass the sensors.
What garage door noises mean I need repair?
New grinding, scraping, banging or popping combined with jerking, crooked movement, a loose cable or a heavy door deserves professional diagnosis. A light squeak may be maintenance-related, but the source should still be identified.
Can garage door maintenance prevent every breakdown?
No. Springs, rollers, opener components and other parts still wear out. Maintenance helps identify developing wear and unsafe conditions earlier, but it cannot guarantee that a component will never fail.
When should I call a professional instead of doing maintenance myself?
Call when the door is heavy, crooked, off track, has a broken spring, a loose or frayed cable, repeated grinding, failed safety-reversal testing or other signs of mechanical instability. High-tension spring and cable work should be left to trained technicians.
Does Santa Clarita heat change garage door maintenance needs?
Heat, direct sun and dry conditions can make lubrication, opener temperature, sensor behavior and roller noise more noticeable, but they do not replace component-level diagnosis. Inspect the actual springs, rollers, cables, tracks, sensors and opener when behavior changes.
Use This Checklist to Catch Problems Before the Garage Door Stops Working
Garage door maintenance is most useful when it helps you notice change early. A new grind, a frayed cable, a heavy door, a sensor that stops working or a roller that begins wobbling can be easier to address before the door becomes stuck or unstable.
Need Help With a Maintenance Finding?
Call Next Hour Garage Door Repair Santa Clarita | Garage Spring & Opener Repair at (661) 449-2694 to ask about current service availability. Describe what you found—spring damage, roller noise, cable wear, sensor trouble, opener strain or another symptom—so the repair discussion can start with the actual condition.
10 Responses